 Anacortes Siding
 "New-construction window" is a specific term in this trade, not a marketing phrase — it describes a window built with a nailing fin that fastens directly to the wall sheathing before the weather-resistive barrier and siding go on, as opposed to a replacement or "pocket" window that slides into an existing frame. In Bow, where new builds, additions, and full re-sides sit alongside older farmhouses near Samish Bay and Padilla Bay, we install both types regularly, and they are not interchangeable jobs. A new-construction window gives us access to bare studs and open sheathing — which is either a genuine advantage or a wasted opportunity, depending on whether the flashing sequence underneath the fin is done correctly before it's covered up for good.
What "New Construction" Actually Means for a Window
A new-construction window has a flange — usually called a nailing fin — built into the perimeter of the frame. That fin gets fastened straight to the sheathing around a rough opening, and the weather-resistive barrier (WRB) and siding are then integrated over and around it in a specific order. This is different from a replacement window, which is sized to slide into an existing window frame that stays in the wall, with the old exterior trim generally left in place. New-construction windows are the standard choice for ground-up builds, additions, and any project where the wall is already open to sheathing — which includes a full re-side down to bare studs, not just brand-new homes.
The distinction matters because the two installation methods put the weatherproofing responsibility in different places. On a replacement window, the existing frame and exterior cladding are doing a lot of the water management already, and the new unit has to work within that. On a new-construction window, there is no existing frame to lean on — the flashing, the WRB lap sequence, and the fin fastening are the entire water management system at that opening. Get it right and the window performs for decades. Get it wrong and the mistake is sealed behind siding, often for years, before it shows up as a stain or soft spot on a wall.
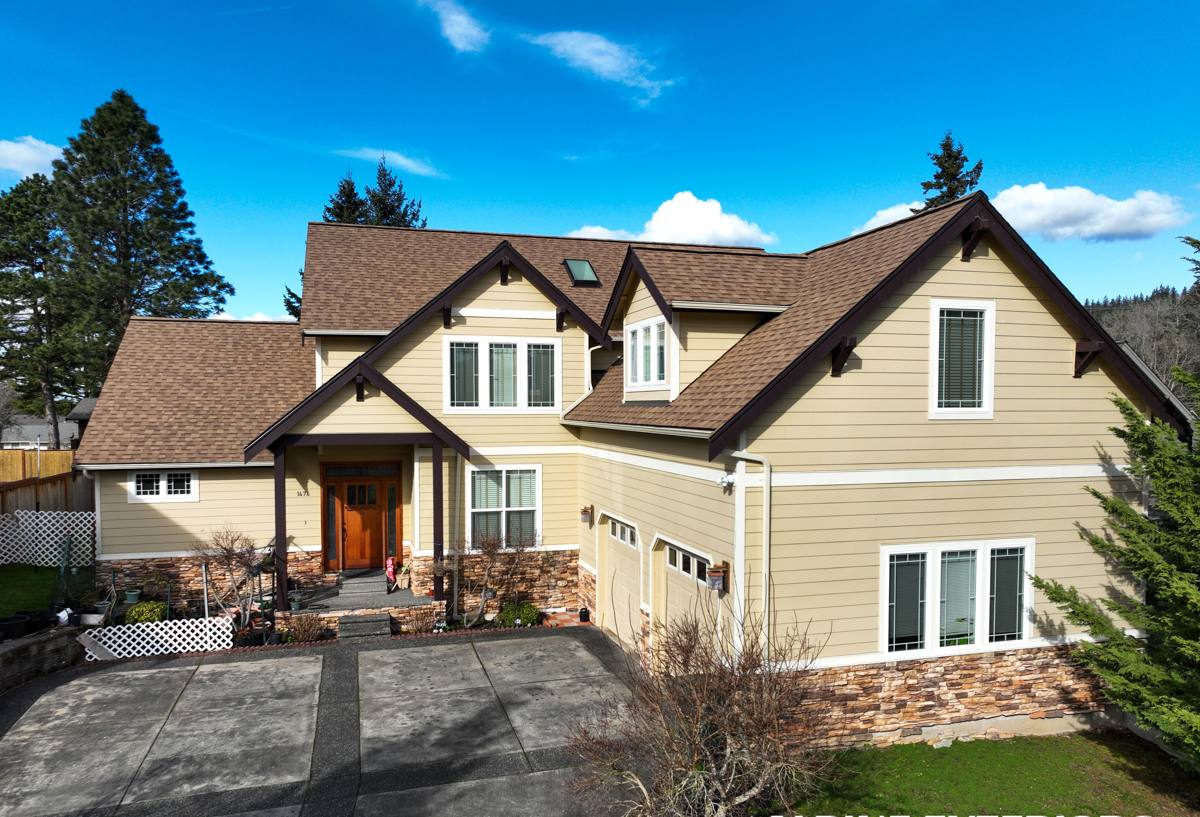
Why Bow's Climate Makes the Installation Sequence the Whole Ballgame
Bow sits close enough to Samish Bay and Padilla Bay that homes here deal with a genuinely harder environment than a standard manufacturer installation guide assumes. Salt-laden air off the water works on exposed fasteners and lower-grade fin materials faster than it would inland. Storms coming off the water drive rain sideways into walls instead of letting gravity carry it straight down, which finds any gap in a flashing sequence that a calmer climate would never test. And the damp, often shaded lots common around Bow support a moss season that runs long — moss and standing moisture hold water against a wall assembly far longer than a drier region would ever see, which punishes any shortcut in the WRB lap or sill pan detail underneath.
None of that changes the basic method for installing a new-construction window. It changes how much margin for error the job has. A sill pan that's "close enough" or a WRB lap that's backwards by one course might never leak in a mild, dry inland climate — the water simply never arrives in enough volume or from the right angle to find the flaw. In Bow, it usually does eventually.
The One Chance You Get
This is the real difference between new-construction work and a repair call five years later. Once the siding goes back on over a new-construction window, the flashing underneath is inaccessible without tearing the wall open again. There's no second visit to fix a sill pan that was skipped or a fin that wasn't sealed on all four sides — whatever sequence goes in now is what that wall lives with. That's exactly why new-construction installs deserve more attention to sequence than most homeowners realize, not less, even though the window itself often looks like the simpler job on paper.
When New-Construction Windows Make Sense in Bow
New-construction windows aren't just for brand-new homes. In practice, we install them any time a wall is already open to sheathing, which covers more situations than people expect.
- Ground-up new builds — the standard window type for a house being framed from scratch
- Room additions — new wall sections that need windows matched to the rest of the house
- Full re-sides down to sheathing — when old siding is being stripped off anyway, it often makes sense to switch from old replacement windows to properly flashed new-construction units while the wall is open
- Water damage repair — where rot has forced removal of siding and sheathing around an opening, a new-construction window lets us rebuild the flashing correctly instead of patching around an old frame
- Egress additions in new framing — bedroom or basement additions where a new rough opening is being framed to code, not fit into an existing hole
If your project doesn't involve opening the wall down to studs, a replacement window is usually the right call instead — there's no benefit to disturbing intact siding just to install a nail-fin unit. We'll tell you honestly which category your project falls into before recommending either approach.
What a Correct New-Construction Window Install Involves
Sill Pan Flashing First
Before the window ever goes into the opening, the sill needs a pan — a shaped flashing detail that catches any water that gets past the window itself and directs it back outward, not into the wall cavity. This is the single most important step in the whole sequence and the easiest one to rush. In a climate that sees as much driving rain as Bow does, a missing or poorly sloped sill pan is the most common root cause of a window leak we find when we're called in to fix someone else's work.
WRB Integration and Shingle-Lap Sequencing
The weather-resistive barrier around the opening has to be cut, folded, and layered in a specific order — generally referred to as shingle-lap, meaning each layer overlaps the one below it the way roof shingles do, so water is always directed down and out rather than up and in. The window's nailing fin gets integrated into that sequence at the correct point, with flashing tape over the fin on the sides and top. Getting this order backwards is invisible once the siding goes on, which is exactly why it matters that whoever is doing this work does it the same correct way every time, not just when someone's watching.
Nailing Fin Fastening and Head Flashing
The fin gets fastened per the manufacturer's spacing, and a head flashing or drip cap goes above the window to shed water away from the top of the opening before it ever reaches the fin. Fin material matters here — some are integral vinyl or composite molded into the frame, others are separate aluminum or vinyl clips added on. In a salt-air environment, fastener and fin corrosion resistance is worth confirming rather than assuming.
Sealant and Backer Rod, Interior and Exterior
Sealant is the backup layer, not the primary defense — a window that relies on caulk to stay dry, rather than correct flashing sequence, is a window that will eventually leak once that caulk ages and cracks. We use backer rod and sealant at the joints between frame and rough opening, both to control air movement and as a secondary water barrier, but the flashing underneath is what actually keeps the wall dry over time.
Trim and Siding Interface
Once the window is set and flashed, the siding and trim have to integrate cleanly around it — J-channel, brick mold, or a built-up trim package depending on the exterior material and the look of the house. This step is mostly cosmetic, but it also determines whether the final joint between trim and siding sheds water or collects it, so it's not purely an appearance decision.
Questions to Confirm Before the Window Goes In
- Is a sill pan flashing being installed under every new-construction window, with no exceptions?
- What is the WRB lap sequence around the opening, and does it match shingle-lap logic top to bottom?
- Is the nailing fin taped on all sides, not just fastened and left exposed?
- What fin and fastener materials does the window use, and are they suited to a salt-air environment?
- Is there a head flashing or drip cap above the opening, separate from the window unit itself?
- Who is responsible if a leak shows up at this window in two or three years — the installer or only the manufacturer?
Our Process, Start to Finish
- Site and opening review — we confirm rough opening sizes against the window schedule, and check what stage the wall is at (framed, sheathed, WRB in place)
- Sequence planning — we walk through the flashing and WRB integration plan for each opening before any window is set, especially around corners, additions, or transitions to different siding materials
- Sill pan and flashing installation — each opening gets its sill pan and flashing tape installed before the window ever goes in
- Window setting and fastening — units are set square and plumb, fastened per manufacturer spec, and shimmed as needed
- Fin taping and head flashing — sides and top are taped into the WRB sequence, and head flashing is installed above each unit
- Sealant and interior finish coordination — exterior sealant is applied at the appropriate stage, and we coordinate with interior finish work so nothing gets covered before it's inspected
- Trim and siding integration — final trim work ties the window cleanly into the surrounding exterior material
New Construction vs. Replacement Windows
Both are legitimate approaches — the right one depends entirely on what stage your project is at, not on which is "better."
| Factor | New-Construction Window | Replacement (Pocket) Window |
|---|---|---|
| How it installs | Nailing fin fastens to sheathing; wall must be open | Fits into the existing frame; exterior cladding stays intact |
| Best used when | New builds, additions, full re-sides to sheathing, or storm/rot repair | Swapping an old window without disturbing intact siding |
| Weatherproofing responsibility | Entirely on the new flashing and WRB sequence — no existing frame to rely on | Shared with the existing frame and trim, which stay in place |
| Disruption | Requires opening the wall to sheathing if not already open | Minimal exterior disturbance |
| Long-term performance | Can be excellent — but only as good as the flashing sequence underneath the fin | Depends heavily on the condition of the existing frame it's set into |
What Drives Cost on a New-Construction Window Project
We won't quote a number without seeing the openings, but these are the factors that consistently move the price:
| Factor | Why It Matters |
|---|---|
| Number of openings | Whole-house projects and additions with multiple windows typically have better per-unit economics than a single opening |
| Wall condition | Sound, dry sheathing is straightforward; rot or prior water damage adds repair work before flashing can go in |
| Window size and type | Larger units, egress-code openings, and multi-window combinations take more time to flash correctly |
| Siding material | Different claddings interface with window trim differently, which affects labor on the finish side |
| Project stage | Coordinating with an active build or a re-side already underway is more efficient than a standalone opening cut into finished siding |
| Frame material | Vinyl, fiberglass, and wood-clad units carry different material costs and different long-term maintenance in a coastal climate |
Why a Crew That Already Works Bow Matters
Manufacturer installation instructions are written for average conditions — a dry, low-wind, low-salt environment that doesn't describe Bow particularly well. A crew that only occasionally works this stretch of Skagit County can follow those instructions to the letter and still end up with a window that struggles here, because the instructions don't account for wind-driven rain hitting a wall from an angle the manual never considered, or for how long moisture sits against a sill during a long, damp moss season. A crew that installs new-construction windows in Bow regularly knows which details in that manual are the ones worth extra time — the sill pan slope, the tape lap order, the fin material choice — because we've seen what happens on this coastline when those details get skipped.
That local pattern recognition doesn't show up in a sales pitch. It shows up in the small decisions made while the wall is still open: adding an extra course of flashing tape at a corner that catches more wind-driven rain than the rest of the house, choosing a sill pan detail that accounts for a shaded, slow-drying wall orientation, or flagging sheathing that's already showing early moisture staining before a window ever gets set into it. Those are the calls that determine whether a new-construction window is still dry and tight in twenty years or is the reason someone's opening up a wall again in five.
Ready When You Are
If you're planning a new build, an addition, or a full re-side in Bow and want the window openings done right while the wall is open, it's worth having a crew walk the project before the windows are ordered. We offer free, no-pressure estimates for new-construction window work in Bow and the surrounding Skagit County area — use the form below to get a time on the schedule.